For those of you who have used the free VOIP service Google Voice, you probably already know how awesome it is. The only downfall of the service is that once you get it setup, the further customization options are sort of hidden and can be difficult to locate. In this tutorial, I'm going to show you exactly how to setup a custom voicemail greeting using Google Voice.
Step #1: Log Into Your Google Voice Dashboard
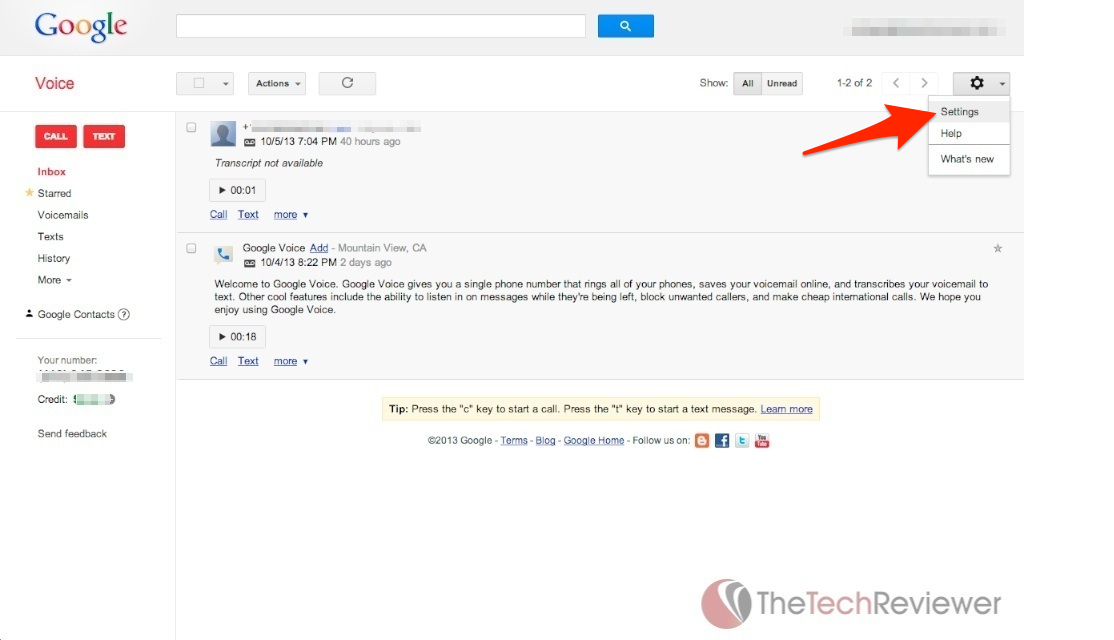
Step #2: Click The Gear Icon & Select ‘Settings'
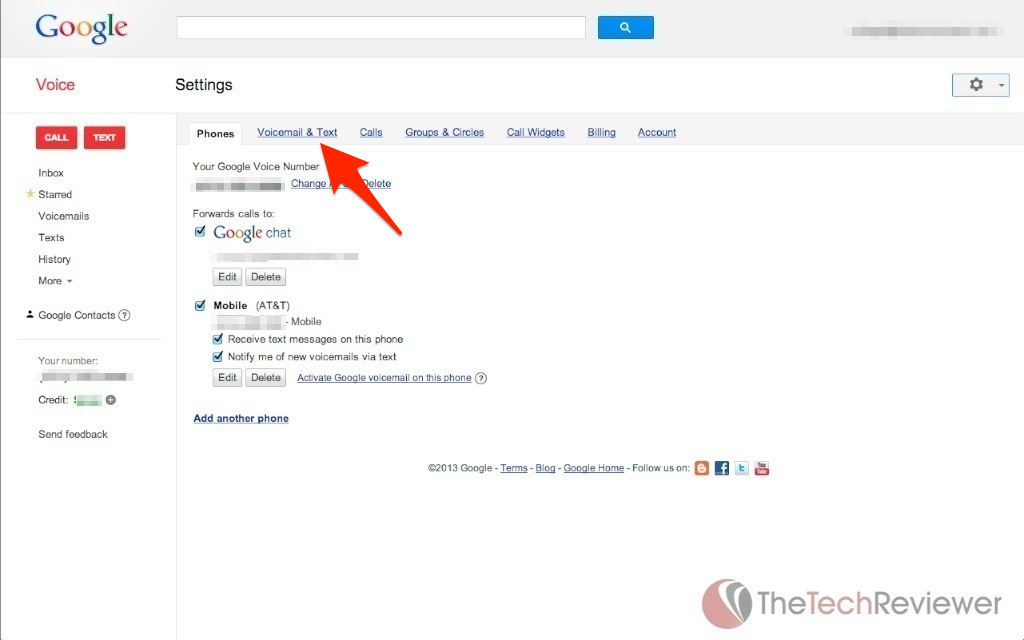
Step #3: Click On The ‘Voicemail & Text' Tab
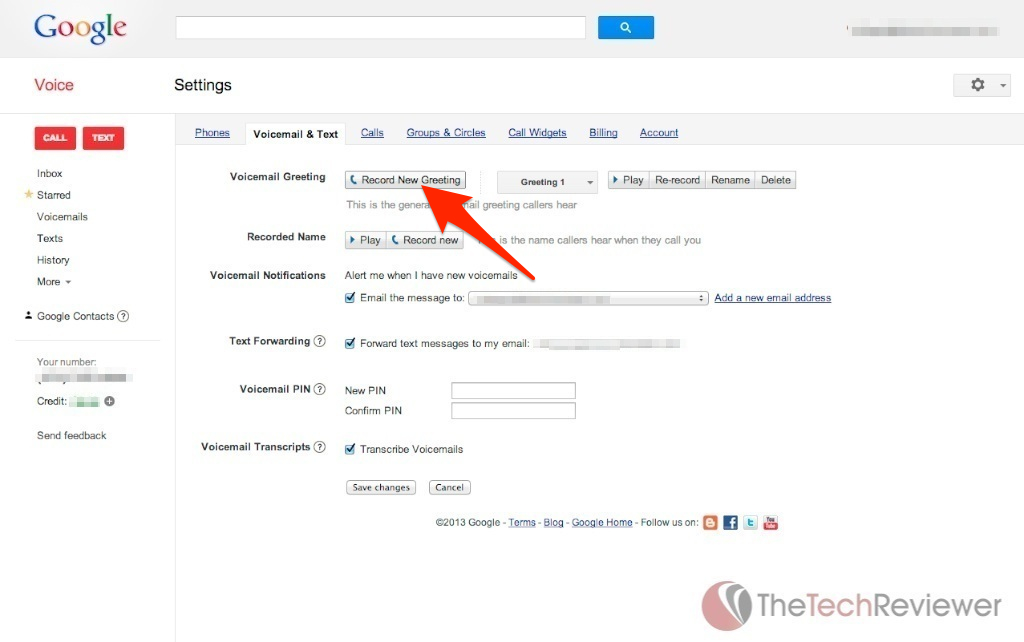
Step #4: Click The ‘Record New Greeting' Button
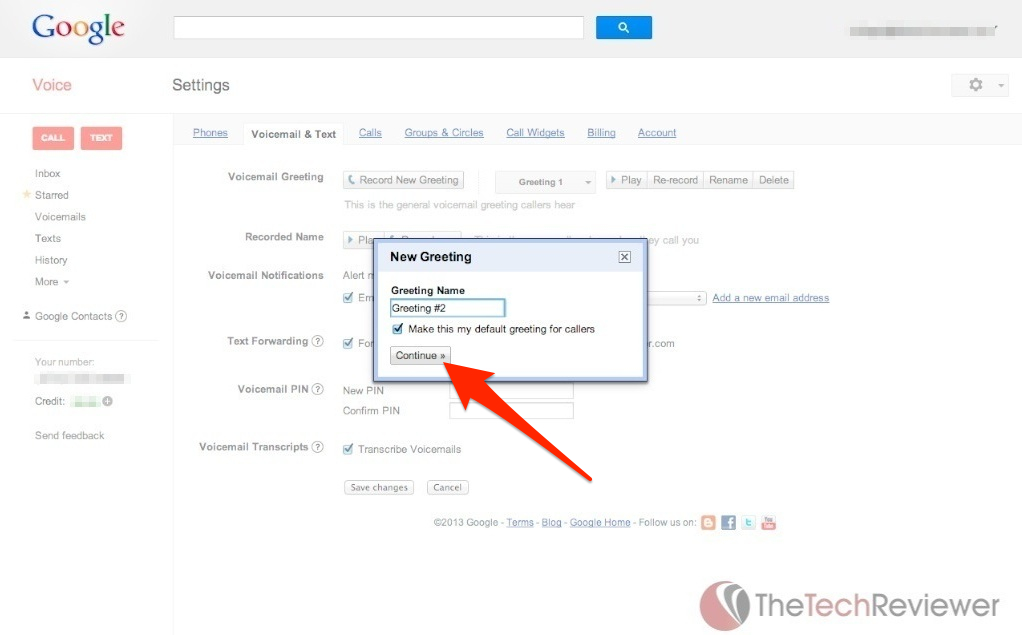
Step #5: Enter Your Desired Greeting Name & Click ‘Continue'
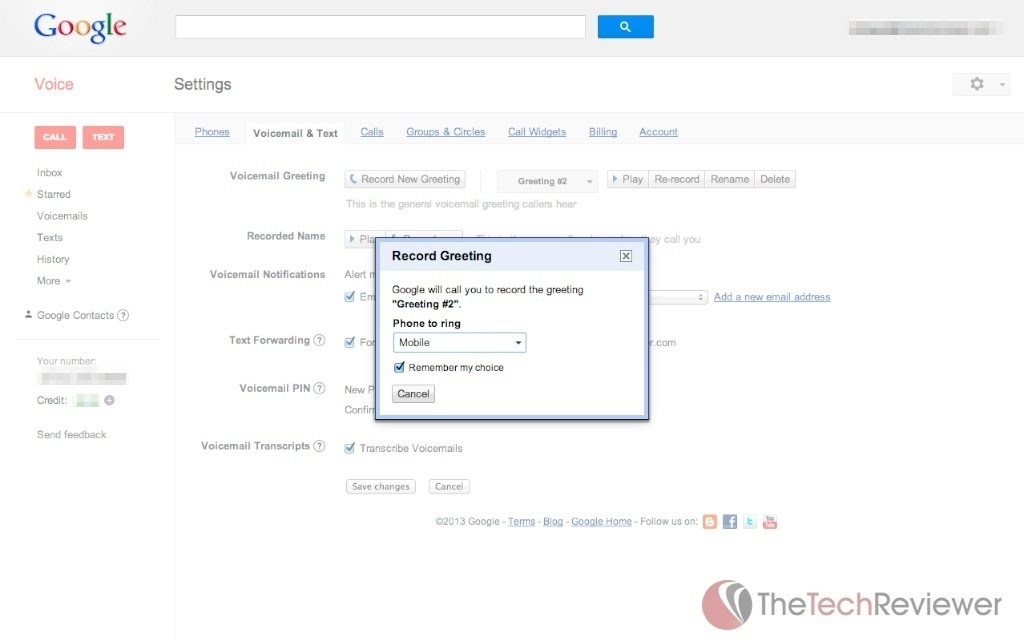
Step #6: Answer The Google Call & Record Your Greeting
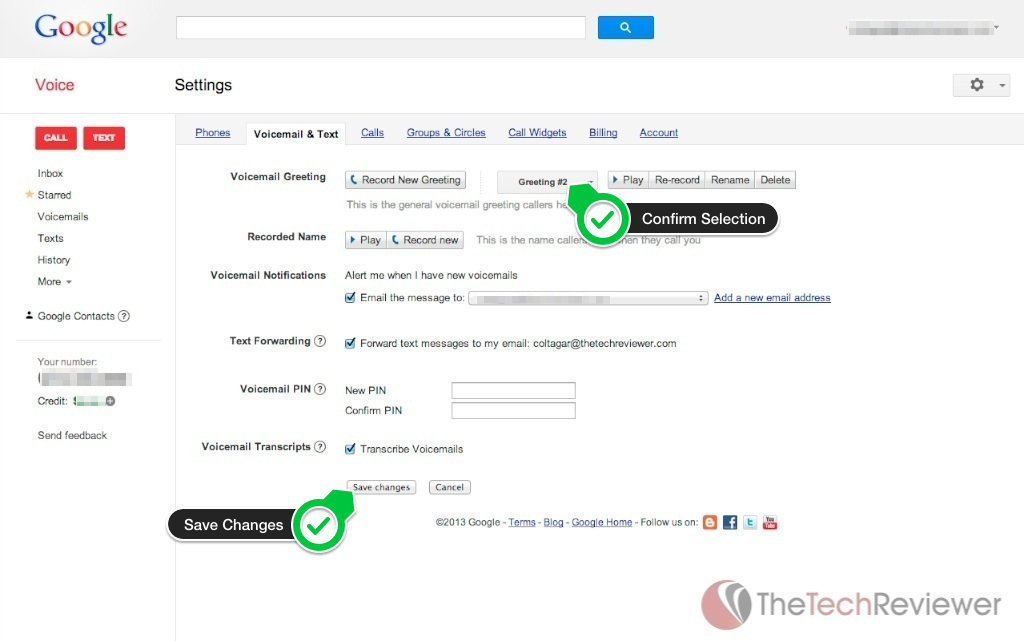
Step #7: Confirm Your Recorded Greeting Is Selected Then Click ‘Save Changes'